
A Garden For All: How to carve a miniature pumpkin
A Garden For All: How to carve a miniature pumpkin
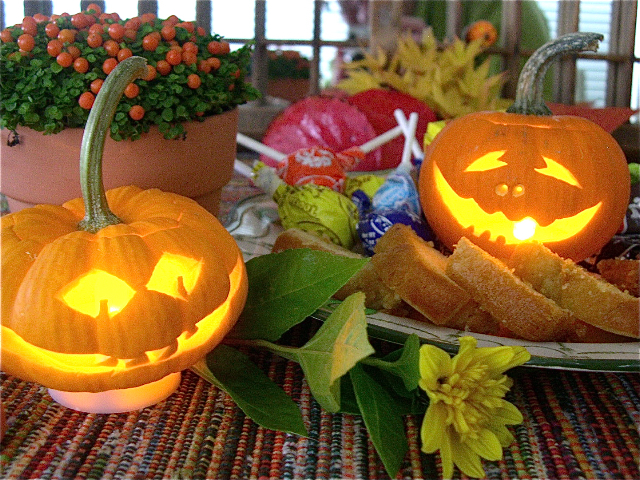
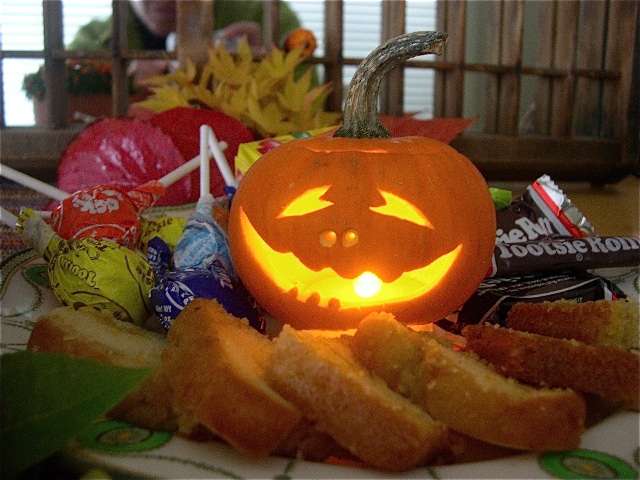
Miniature pumpkins are fun, quick and easy to carve. Use them for place settings, or for a little fun where you need it. CLICK IMAGE TO VIEW MORE.
Photos by Janit Calvo
Wed, 10/14/2009
Here is very cute idea for Hallowe’en. Several of these can make a nice table arrangement, or they can be a little gift placed at each table setting if you’re having a sit down dinner.
It can even make an oh-too-cute hostess gift.
Carving a miniature pumpkin it almost like carving a big one – almost. There is little room for error (literately) and, because you are holding the pumpkin in hand, you’ll have to have total control over the knife, lest you might hurt yourself. This may be too meticulous for kids, as they’ll need to have full control over the knife, and work small.
The beauty of this, however, is that there is very little mess to contend with afterwards, AND you won’t mind spending a whole three minutes sorting out the seeds to roast!
For this experiment, I tried a miniature Cinderella pumpkin (Called that because it looks like her chariot that she went to the ball in) and a wee sugar pumpkin (No, I won’t be making a pumpkin tart out of it! Stop that!).
Here are some more pointers I’ve come up with:
- No.1 RULE: Always, always be mindful of the “line of cut” when using any sharp tool. Whether it’s huge and moving, like a chainsaw, or small and sharp, like an Exacto knife, you still can do some serious damage if you are not paying attention to where the blade might end up.
The “line of cut” is where the blade is being cut along and towards, AND it is where it is where the blade might slip by accident.
When carving the pumpkin material, sometimes the blade gets “stuck” and you may apply more pressure to move it forward. When the material suddenly releases the blade, it will move fast, and this is where you can get hurt. Always err on the side of safety and keep your hands and fingers of the opposite hand, on the backside of the pumpkin, away from the line of cut. Always.
- Hold the pumpkin firmly at all times. Brace it against your body for more control – but wear a heavy apron, a thick garden jacket or a several layered rags because if the knife slips, you’ll cut yourself and your clothes. (This lesson was learned the hard way, in first year wood studio class in art college, with a pair of brand new jeans.)
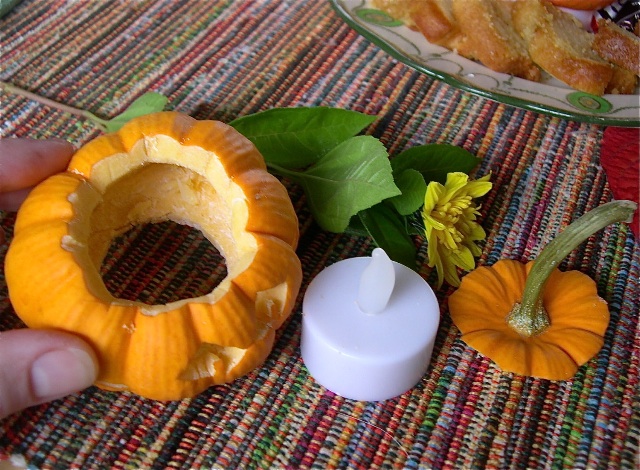
- Cut the top off as you would a regular pumpkin, trim the inside of the lid and scoop out the guts. I like to shave the walls down a bit more where the face is going to be, to make it a bit thinner. You can do this with a teaspoon because it’s so small.
- Because there isn’t a lot of room to cut into, I used a grapefruit knife that is serrated on both sides so when I sunk it into the flesh, it would cut where I wanted it too. I roughed in the major lines and didn’t poke the pieces through until I was ready.
- Halfway through carving the face, hold the pumpkin wall with your fingers inside and outside the wall, to brace the cut part while you finish into the rest of the face. This is so you don’t tear the pumpkin or smush in the face by accident.
- I trimmed up the lines and detailed the teeth with a sharp Exacto knife after I roughed it in with the grapefruit knife. I shaved the inside of the cutouts too, to make a cleaner view when the pumpkin is lit.
- I used a fake tealight to light it. They are great, the on/off switch is on the bottom – and they flicker too! Hold the tealight and the pumpkin bottom to bottom, and trace around it on the pumpkin. Cut out the hole and try not to make it any bigger than it needs to be. The pumpkin will shrink over time and it won’t be able to hold the tea light where you want it.
- Depending upon the size of the pumpkin, the tealight can be raised or lowered to get the maximum light through the face. The whole pumpkin sits on the tealight.
- Happy Hallowe’en!!
Related Links
